Difference between revisions of "X-Payments:NoFraud fraud prevention"
m |
m |
||
| Line 5: | Line 5: | ||
# After creating your NoFraud account, log in to the [https://portal.nofraud.com/users/sign_in Account Manager] portal.<br />[[File:xp3_nofraud_signin.png|600px|border]]<br />On the bottom left of your portal account, you will see a few tabs that require merchant information input. Make sure all the required information for your account has been provided correctly. NoFraud provides some help guides and references in the "Resources" section that you may find helpful. For example, the [https://portal.nofraud.com/resources/NoFraud-Portal-Guide.pdf NoFraud Portal Guide] provides a thorough explanation of all the settings.<br />Please pay particular attention to the "Integration" tab. Through this tab, you will need to select the type of integration you are using. From the 'Add new integration' menu, select the 'Direct API' method. After adding your integration in your portal account, you will get an '''API key''' code for your integration (this code is generated automatically).<br />[[File:xp3_nofraud_integration.png|600px|border]]<br />You will need to copy this code from your account and input it into the appropriate field in X-Payments, so for now simply copy the code to clipboard.<br /><br /> | # After creating your NoFraud account, log in to the [https://portal.nofraud.com/users/sign_in Account Manager] portal.<br />[[File:xp3_nofraud_signin.png|600px|border]]<br />On the bottom left of your portal account, you will see a few tabs that require merchant information input. Make sure all the required information for your account has been provided correctly. NoFraud provides some help guides and references in the "Resources" section that you may find helpful. For example, the [https://portal.nofraud.com/resources/NoFraud-Portal-Guide.pdf NoFraud Portal Guide] provides a thorough explanation of all the settings.<br />Please pay particular attention to the "Integration" tab. Through this tab, you will need to select the type of integration you are using. From the 'Add new integration' menu, select the 'Direct API' method. After adding your integration in your portal account, you will get an '''API key''' code for your integration (this code is generated automatically).<br />[[File:xp3_nofraud_integration.png|600px|border]]<br />You will need to copy this code from your account and input it into the appropriate field in X-Payments, so for now simply copy the code to clipboard.<br /><br /> | ||
# In a new browser tab or window, log in to X-Payments and go to the 'Payment Configurations' page (Settings -> Payment configurations).<br />[[File:xp3_payment_confs.png|border]]<br /><br /> | # In a new browser tab or window, log in to X-Payments and go to the 'Payment Configurations' page (Settings -> Payment configurations).<br />[[File:xp3_payment_confs.png|border]]<br /><br /> | ||
| − | # Locate the payment configuration for which you want to enable NoFraud and click on the NoFraud '''Configure''' link shown near it. It is possible to enable NoFraud service for more than one payment configuration; in this case, you will need to complete NoFraud configuration (as provided by instructions under steps 4- | + | # Locate the payment configuration for which you want to enable NoFraud and click on the NoFraud '''Configure''' link shown near it. It is possible to enable NoFraud service for more than one payment configuration; in this case, you will need to complete NoFraud configuration (as provided by instructions under steps 4-7 of this procedure) for each of these payment configurations.<br />[[File:xp3_nofraud_status0.png|600px|border]]<br /><br /> |
# Clicking on the NoFraud '''Configure''' opens the NoFraud settings page for the chosen payment configuration. For example, in the screenshot below you can see the page for configuring NoFraud to be used with Authorize.Net:<br />[[File:xp3_nofraud_settings.png|600px|border]]<br /><br />Scroll down to page to provide your NoFraud settings:<br /> | # Clicking on the NoFraud '''Configure''' opens the NoFraud settings page for the chosen payment configuration. For example, in the screenshot below you can see the page for configuring NoFraud to be used with Authorize.Net:<br />[[File:xp3_nofraud_settings.png|600px|border]]<br /><br />Scroll down to page to provide your NoFraud settings:<br /> | ||
#* '''API key''': Use this field to input the API key code you have obtained in your NoFraud portal account. | #* '''API key''': Use this field to input the API key code you have obtained in your NoFraud portal account. | ||
| Line 11: | Line 11: | ||
# Save the changes by clicking '''Save'''.<br /><br /> | # Save the changes by clicking '''Save'''.<br /><br /> | ||
# Enable NoFraud service for the payment configuration:<br />[[File:xp3_nofraud_enabled.png|600px|border]]<br /><br /> | # Enable NoFraud service for the payment configuration:<br />[[File:xp3_nofraud_enabled.png|600px|border]]<br /><br /> | ||
| + | That is all; NoFraud service has been activated for the payment configuration in question. Note how NoFraud service status for that payment configuration has changed to "Enabled":<br />[[File:xp3_nofraud_enabled1.png|600px|border]]<br /><br /> | ||
Revision as of 22:31, 14 February 2017
Starting with version 3.0.2, X-Payments provides integration with NoFraud. NoFraud is a comprehensive fraud prevention service that employs every known fraud prevention technology in a single centralized system, producing the most precise decision-making fraud prevention application. NoFraufd sits between your store site and your payment gateway reviewing payment transactions in real time through complex algorithms so that only the legitimate transactions are sent to the gateway for processing. Any transactions declined by NoFraud are bounced back to the customer while they are still at the cart. Approved transactions are passed along to the gateway for uninterrupted processing. For the small percentage of transactions where a Pass or Fail decision is not available, NoFraud contacts the cardholder for verification. As a result, NoFraud eliminates the need for manual review of transactions and prevents the declining of legitimate customers. NoFraud takes just a few minutes to set up and does not require training or dedicated staff to run or maintain. With no setup fees and low per-transaction billing rates, NoFraud allows anyone to try the system with little risk. All you need to do is choose a plan to match your needs. You can even get a one or two week free trial by contacting NoFraud at info@nofraud.com or 888-773-3669.
To start using NoFraud, complete the steps below:
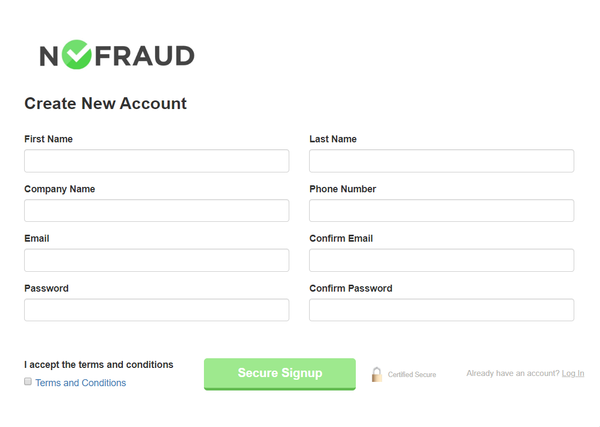
- If you haven't yet done so, sign up for a NoFraud account.
- After creating your NoFraud account, log in to the Account Manager portal.
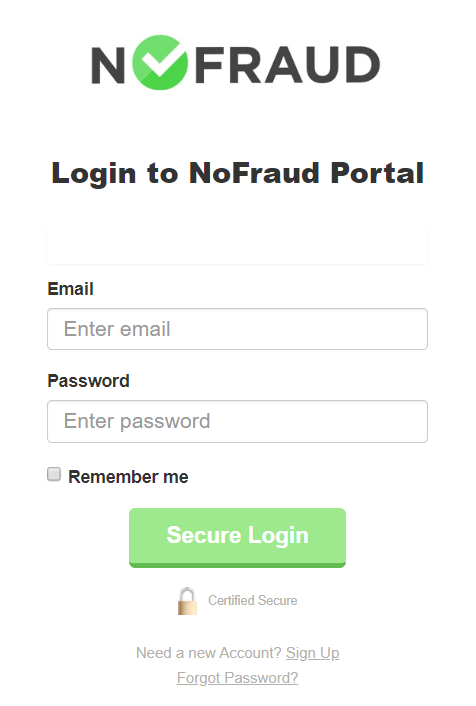
On the bottom left of your portal account, you will see a few tabs that require merchant information input. Make sure all the required information for your account has been provided correctly. NoFraud provides some help guides and references in the "Resources" section that you may find helpful. For example, the NoFraud Portal Guide provides a thorough explanation of all the settings.
Please pay particular attention to the "Integration" tab. Through this tab, you will need to select the type of integration you are using. From the 'Add new integration' menu, select the 'Direct API' method. After adding your integration in your portal account, you will get an API key code for your integration (this code is generated automatically).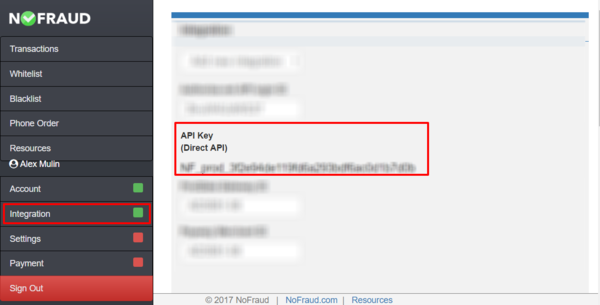
You will need to copy this code from your account and input it into the appropriate field in X-Payments, so for now simply copy the code to clipboard. - In a new browser tab or window, log in to X-Payments and go to the 'Payment Configurations' page (Settings -> Payment configurations).
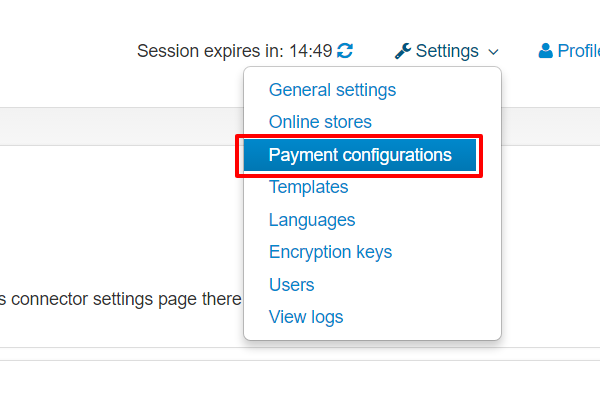
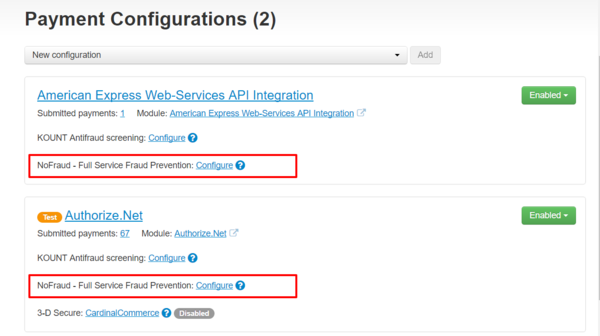
- Locate the payment configuration for which you want to enable NoFraud and click on the NoFraud Configure link shown near it. It is possible to enable NoFraud service for more than one payment configuration; in this case, you will need to complete NoFraud configuration (as provided by instructions under steps 4-7 of this procedure) for each of these payment configurations.
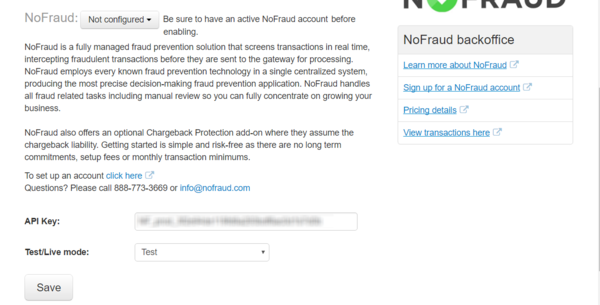
- Clicking on the NoFraud Configure opens the NoFraud settings page for the chosen payment configuration. For example, in the screenshot below you can see the page for configuring NoFraud to be used with Authorize.Net:
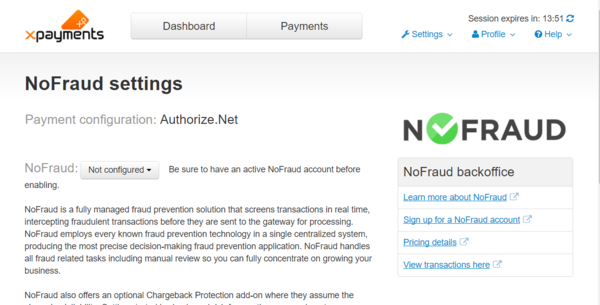
Scroll down to page to provide your NoFraud settings:
- Save the changes by clicking Save.
- Enable NoFraud service for the payment configuration:
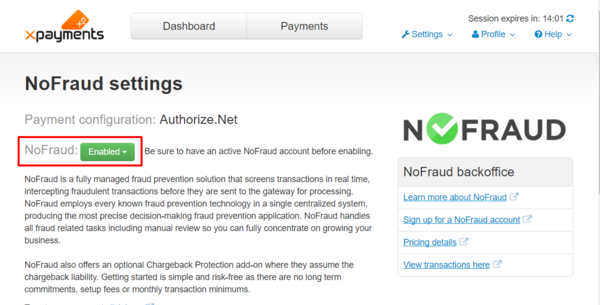
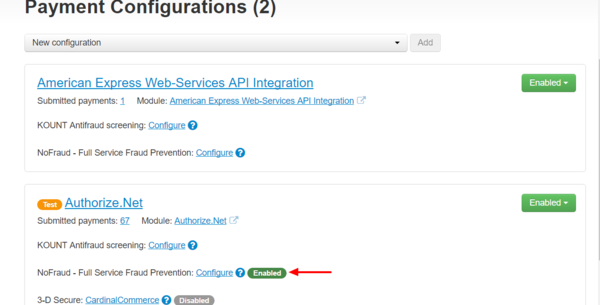
That is all; NoFraud service has been activated for the payment configuration in question. Note how NoFraud service status for that payment configuration has changed to "Enabled":